the hostgator coupon Google Ping atoo lee: Tips and Tutorials
Showing posts with label Tips and Tutorials. Show all posts

Monday, February 27, 2012

Galaxy Shirt Tutorial

Is that not the most awesome shirt you've ever seen, or what?! Wanna learn how to make your own? Keep reading...
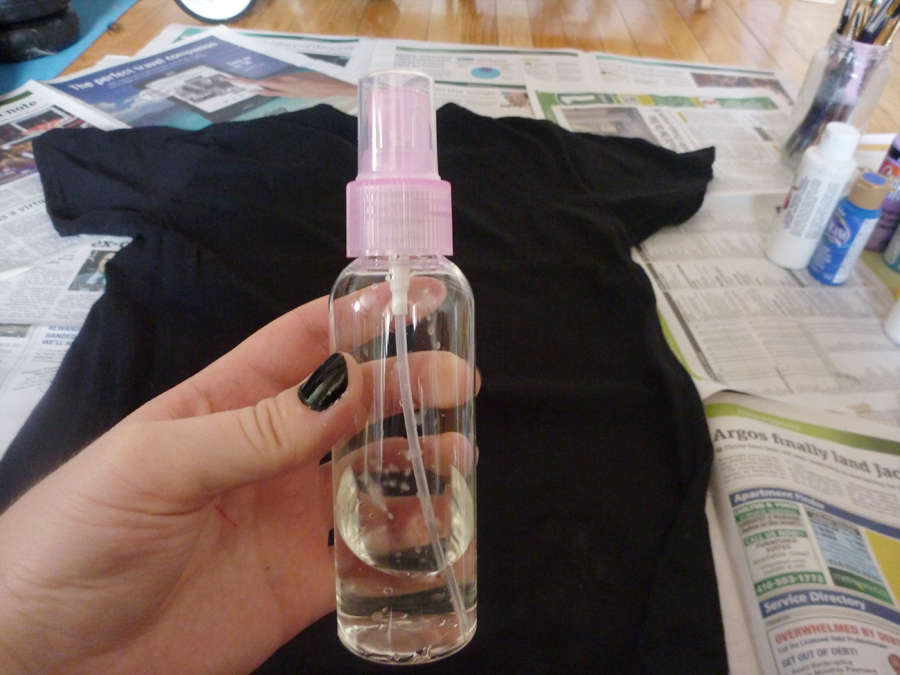
You'll need some bleach and a little spray bottle. You won't need a lot of bleach (even what I had in my bottle was way too much) I mixed my bleach with some water, but not much.
You're also going to need some fabric paint. I have a lot of acrylic paints so I ended up getting this acrylic fabric medium, which basically turns any normal acrylic paint into fabric paint. Magic. I would say the best colours to use would be white, blue, purple and yellow. (but you can use any you want)
You'll also want to get a black t-shirt or any piece of black clothing.
a) Spray some bleach on your t-shirt . Make blotchy circles, don't cover the whole shirt with bleach though. You want a lot of black space too or it'll look too crowded once you put the paint on.
b) Now start splashing, dripping and smudging your fabric paint. You might want to use a sponge or something similar (paper towel?) but I used my hands. Make sure to wear old clothes and put some newspaper down, because you will get dirty. It's probably better to do this outside.
This is the same shirt but the front of it. I started with the back first to practise.
TIP: Start with the bleach, then splash on some white 'stars', then start making smudged areas of colour. I started with white, then yellow, followed by blue and purple. Build the coloured areas. Make sure they are close together and overlapped. It gives it a nice effect. Then I finished it all off with another coat of white 'stars'. I think they 'stars' look better when they're really small.
I did one side at a time and I let the whole shirt try overnight and then put it in the wash the next day.
This is my shirt after it was washed. Still looked the same, no fades and the shirt feels the same too. Doesn't feel like theres hard dried up paint stuck to it, you know?

Totally going to make some galaxy tights and/or shorts too. Even thinking about turning one of my old boring black dresses into a galaxy dress. Wouldn't that look cool? Yeah, it's done. I'm doing it!

P.S. What's the difference between a tutorial and a diy?

Wednesday, January 11, 2012

Dream Catcher

Growing up I remember always having a dream catcher in my room. The other day I decided to make my own little dream catcher. I'm not gonna lie though, I bought a dream catcher kit from the dollar store... but it didn't come with any instructions! I've never made one before and I probably should have looked online a bit to get an idea of what I was doing.

Well, I had fun and that's all that matters. I watched some videos afterwards and I found out I was pretty close. I just ended up using a lot of glue.

This was what was in my little kit. A metal hoop, some feathers, beads, string, a plastic needle (didn't really need it) and some leather strips. You can get most of these things from a dollar store, craft store, and stores like walmart. (I love walmart.) I think the hardest thing to find would be the hoop and leather. You could always use a bracelet, a strong necklace or basically anything that's a circle! Instead of leather you could always use other coloured string/yarn/fabric. I'm thinking to make another one with colourful yarn.

First I started wrapping the leather around my hoop. This was my first try, I think I was supposed to tie the ends together. Well I sucked at it so I got out my hot glue gun and glued the ends down.

See? much better! Glue and tape fixes everything.

Then I just went all over the place with the string. You basically make little loops with your string all around your hoop. You keep going until you can't anymore. Pop in a bead once in a while too. Next time I think I'll make the loops a lot closer together.

I think I was supposed to tie the bull thingy onto the hoop somehow... but I just ended up gluing it down.

And finally, the feathers... I didn't use the feathers from the kit. Instead I used my own colourful feathers. I glued them together and hid the glue with the beads. But really you're supposed to tie them together. See they make a rainbow? :]

Have you ever made a dream catcher? Am I the only one that used glue?

Monday, October 31, 2011

Zombie Tutorial

So you want to be a Zombie?!

What you'll need:
Old clothes
Sissors/knife
Halloween face paint/makeup
Fake blood
Flour/baby powder


1. Get some old clothes and rip them up. Get a good pair of scissors and cut some holes in those pants and make some rips in your shirt. Use a small knife on any tough material like jeans. If you don't want to use any of your old clothes then take a trip to your local thrift/second hand store.


2.You'll want to get some of those Halloween face paints you see in stores this time of year (if not you can always just use normal makeup) You'll want to get some black and white paints. You'll want to start out with a layer of white makeup on your face, don't forget to put makeup on any exposed skin too. (arms, hands, neck, legs etc.) Then you'll want to blend (using your fingers, a sponge or a tissue) in some black, careful don't use too much black, start off with a very small amount. Blend it all together and get the shade of grey desired. Pay special attention to the eyes, you'll want to add a darker layer of grey around your eyes.


3. Grab a handful of baby powder or flour and rub it all in your hair. This will make you look even dirtier and like you came from under the ground. This looks best with darker hair. Rub in as much or as little as you want. If you'd like, put some on your face and clothes too.


4. Now for the most fun part and most messiest! Get your fake blood out go nuts. You'll want to put the most amount on and around your face. Some blood on the corners of your mouth, under your nose, coming from your hair line, and maybe even under your eyes. (Careful to not get any in your eyes or mouth.) Don't forget to put some blood on your clothes too. Smear it, splash it and drip it on your clothes for different effects.

5. Now that you look like a zombie, it's time to start acting like one. Start practicing that stiff-leg-walk. Zombies are very slow, so don't move too fast. Get a good stare-face going and blink as little as possible. Don't forget your moans. Like the moans you used to hear in school when your teacher said there was a test tomorrow, and the whole class would moan. (well, maybe you still hear that if you're still in school.)


TIPS:
> Add some small amounts of green face paint to your skin to give it that extra rotting look.
>Instead of putting flour or baby powder in your hair, try oatmeal. If you're using very liquid-y face paints, you can put some on your face with the paint to give your face more texture.
>Don't forget to tease your hair a bit for a messier look.
> Be careful about putting face paint and fake blood around your eyes and mouth. Even if they say it's non toxic, that shit stings and will make your eyes water.

Tuesday, October 4, 2011

Melted Crayons

I first saw the idea over on Stelabird Blog. (Went searching on the net and found what I think is the original link here or here.) Obviously what caught my attention were all the pretty colours, and I thought to myself, 'hey I got some old crayons...'

EDIT: Decided to add some steps/tips to this. :]


YOU WILL NEED:
  • Any size canvas (Stiff paper)
  • Crayons!
  • Glue (Hot glue gun)
  • Hair blow dryer

  • I used a much smaller canvas and way less crayons.

    1. Glue your crayons in any order onto your canvas/stiff paper.
    2. Start blow drying! You also might want to lay down some newspaper on the ground if you're doing this indoors like I did.


    TIPS:
> Instead of canvas, you could also use cardboard or any kind of stiff paper.
> You don't need to use hot glue for the crayons, (it's probably better though) I used just a plain glue stick. When the crayons start melting they'll stick themselves to the canvas and each other anyways.
> You want the blow dryer on its hottest setting but maybe on its lowest 'power' setting. If your blow drying is on its highest power setting, when the crayons start melting they'll be splashing everywhere and making more of a mess.

      That one crayon just wouldn't melt!

      This last one is a scanned version.